
The goal of this tutorial is to show the very basics of using ClothFX to deform an object in Layout. I was unable to find even basic tutorials on how to use ClothFX and even the LightWave 9 documentation did not provide a good description of using this specific dynamic. Although the documentation explains each individual control, it does not show how to setup a scene and get it working correctly.
I will show you how to get a cloth object to drape over a ball. The scene is extremely simplistic, but it is meant to give you a starting point for using ClothFX.
| Create a new object in Modeler. Make a ball with .5m radius for all directions, 24 sides, and 12 segments. After you create the ball, press F2 to center it around the origin. Save the new object. | 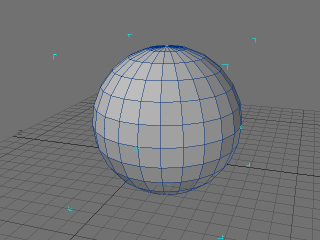 |
| Create another new object in Modeler. Create a box with Width 3m, Height 0m, Depth 3m. Set the radius segments for X and Z to 12. This will create a flat plane. Press ‘shift-T’ to triple the polygons. Press F2 to center it. Finally, press ‘f’ to flip the polygons down. Making the polygons face the object it will interact with can sometimes improve the accuracy of the simulation. Save the object./td> | 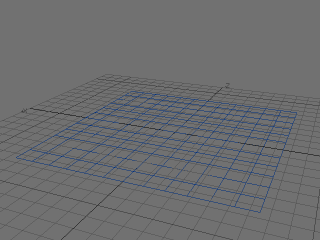 |
| Open Layout and load the two objects you just created. Move the cloth object (the flat plane) in the Y direction to position it about half a meter above the ball. |  |
| Open the surface editor. For the ball’s surface, give it a green color and turn on smoothing. For the cloth surface, give it a red color, turn on smoothing, and set the surface as double sided. |  |
| Next we will add the ClothFX dynamic to the cloth object. Select the cloth object and open the object properties. Go to the ‘Dynamics’ tab and add a Cloth dynamic from the drop-down selector. Double click the new ClothFX dynamic from the list to view the settings. Change to the ‘Etc’ tab of the ClothFX settings and change the gravity ‘Y’ value to ‘-9.8m’. Select ‘Cotton (thick)’ from the ‘Preset’ drop-down. Then re-select “Cotton (thin)’. This will force the presets to change to the ‘Cotton (thin)’ values (various settings were affected by this change, such as the Sub Structure, Spring, Compress Stress, Stretch Limit, etc.). Press the ‘Calculate’ button to see the changes. The cloth should drop down, but it will fall through the ball instead of draping over it! |  |
| Next, we need to set up the collision settings on the cloth. Go to the ‘Collision’ tab of ClothFX and change the ‘Collision Detect’ to ‘<all>’. Leave the other settings at their default values. Press calculate. The cloth still drops through the ball! The next step will fix that. | 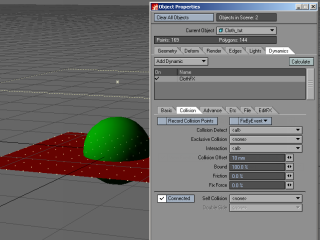 |
| Open the object properties for the ball and go to the ‘Dynamics’ tab. Add a new ‘Collision’ dynamic and double click to open the properties. The default settings should work here to get some basic interaction with the cloth. Press calculate and try it out. Your simulation may, however, show too much of the ball through the cloth as it is draping over it. To fix this, go back to the ClothFX dynamics in the cloth object and change the ‘Collision Offset’ value (‘Collision’ tab) to a higher value. This pushes the collision out further from the cloth. A value of 50mm worked well for me. | 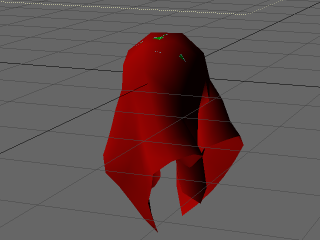 |
A few last important notes:
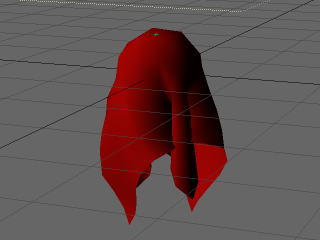
The cloth on the right was calculated using the ‘Silk’ preset. |
 |