Subdvision Body Model by Wiro
11) We cut two new loops and shape the armpit. We'll leave the lose ends for now because when we attach the legs there will be a bunch of places to continue them towards

12) Cut 3 new cross sections into the arm

13) move the vertices into shape; outline the deltoid, elbow and forearm

14) Here's an important step. Twist or rotate the outer edgeloops 90 degrees.
Many people keep the loops straight even when the hands are flat but it makes more sense to twist the forearm as it follows the flow of the muscles. If you modelled them straight with palms flat and you then animated the palms to face forward (the only direction you can twist your arm), they would cross the muscles instead of flowing with them and create very thin rhomboid faces that won't smooth nicely.

15) Now we add in more loops and start shaping out the arm. This is pretty straight forward since the arm is basically treated as a cylinder.
Up to this step the arm is fairly generic. The next arm steps include some useful steps for further detailing but are mostly specific to the look I wanted. A bodybuilder would have more and different flows of loops

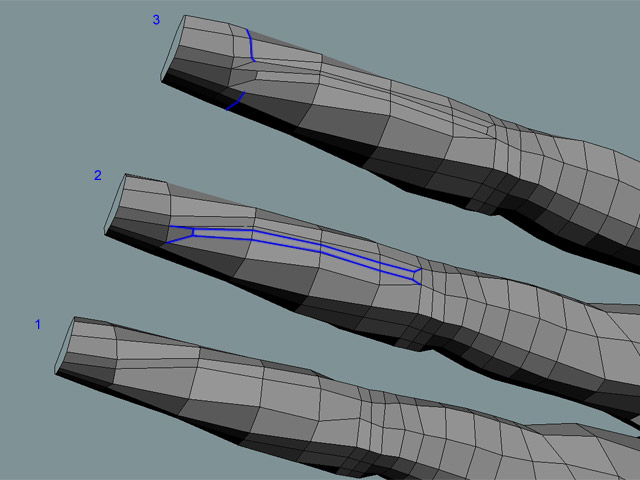
16) Time for some detailing. I wanted to add in some forearm muscles so I bevelled in some faces (2) and added in a loop (3) and pushed verts in and out to shape them
| 1 | 2 | 3 | 4 | 5 | 6 | 7 | 8 |